Mission Prep
Mission Select
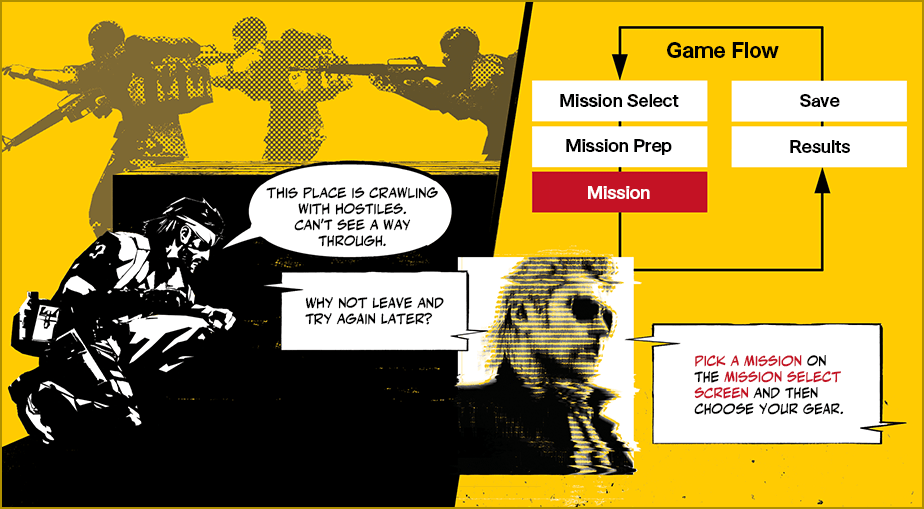
Progess in the game by completing a variety of missions.
Choose the mission you wish to take on from the Mission Selection Menu.
- Press
 on the Mission Selection Menu to go to the Mother Base screen.
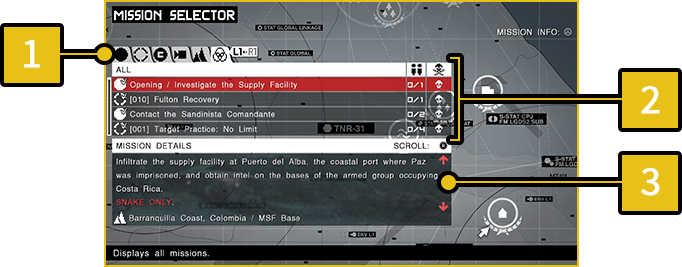
-
1
Mission Category
- Press
 and
and  to switch between the tabs below.
| MAIN OPS | Advance the plot. |
|---|---|
| EXTRA OPS | Unrelated to the main story. |
| CO-OPS | Team up with other soldiers. |
| CUTSCENES | Play all previously seen cutscenes. |
| REGIONS | View missions divided by region. |
| ALL | View all available missions. |
-
2
Mission List
 indicates number of participants/maximum number of participants, and
  indicates the mission difficulty.
-
3
MISSION DETAILS
-
MISSION INFO
Press
 while on the Mission Selection Menu to view the MISSION INFO screen.
| Mission Record | View the Fastest Clear Time, Lowest Kill Count, Lowest Alert Count, Best Clear Rank, etc. for the mission. |
|---|---|
| Soldier Information | This section is available after the establishment of the Intel Team. View information on the enemies and prisoners who appear within the mission. As the Intel Team level increases, more information will become available. |
Getting Ready for the Mission
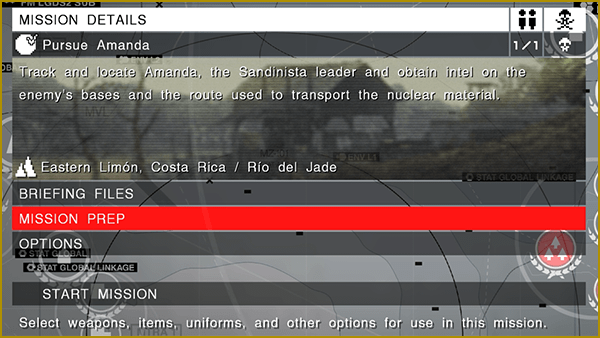
| BRIEFING FILES | Listen to briefings (hints) over the radio. |
|---|---|
| MISSION PREP | Change the character, items, weapons, and uniform to be used. |
| OPTIONS | View/change game settings. |
| START MISSION | Start the mission. |
MISSION PREP
Select your character, weapons, items, and uniform for the mission from the MISSION PREP menu.
- The ★ displayed to the left of the item and weapon names indicates the rank of the objects.
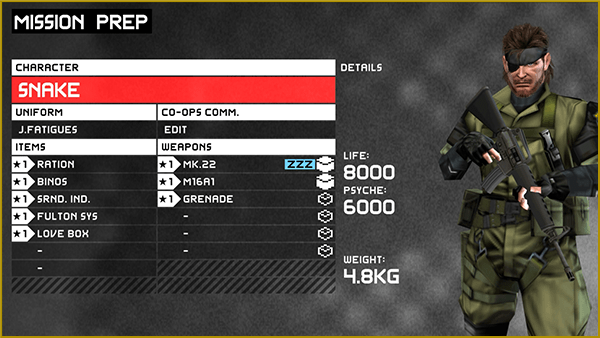
CHARACTER
Select the character you want to use to complete the mission.
In addition to Snake, it is possible to compete missions using MSF soldiers in the Combat Unit.
- There are missions that can only be completed with Snake as well as missions that require using an MSF soldier.
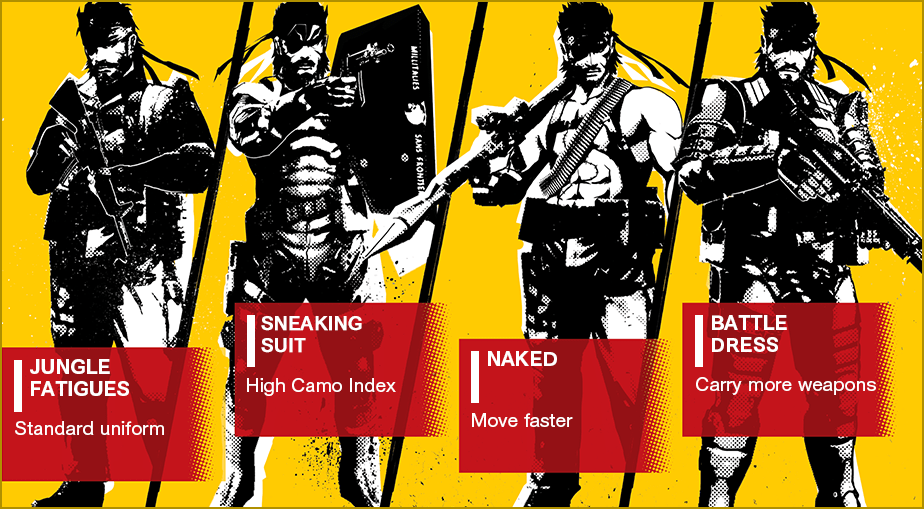
UNIFORM
Select the uniform for the mission.
Each uniform has a different Camo Index that changes based on the terrain.
CO-OPS COMM.
Change the button selections for CO-COPS Communicatoins. Select four messages to assign to four buttons.
There are some messages within the options that have a special Battle Cry effect. Press when setting the CO-OPS Communications to infuse spirit into the phrase or remove it.
ITEMS
Select which items to take on the mission.
Item Categories
 RECOVERY ITEMS RECOVERY ITEMS |
Items that restore LIFE and PSYCHE. |
|---|---|
 EQUIPMENT EQUIPMENT |
Includes items like the Fulton Recovery System and cardboard boxes. |
 RADARS RADARS |
Radars that show enemy location and other information. |
WEAPONS
Select which weapons to take on the mission.
Set both PRIMARY WEAPONS and SUPPORT WEAPONS from this menu.
PRIMARY WEAPONS
 HANDGUNS HANDGUNS |
Lightweight firearms made to be usable with one hand. Easy to use and can be used at the same time as shields. |
|---|---|
 SHOTGUNS SHOTGUNS |
Firearms made to shoot a large number of rounds at one time. Effective in close-range combat. |
 ASSAULT RIFLES ASSAULT RIFLES |
Firearms effective in mid-range combat. Functionality is well-balanced. |
 SUBMACHINE GUNS SUBMACHINE GUNS |
Firearms that are easy to use and excel at rapid fire. Many can be used at the same time as shields. |
 SNIPER RIFLES SNIPER RIFLES |
Firearms equipped with a scope that enable long distance shooting by adjusting the zoom. |
 MACHINE GUNS MACHINE GUNS |
Machine guns that contain many rounds. While reloads take a long time and they are hard to use, they are formidable weapons. |
 MISSILES MISSILES |
Heavy weapons with formidable firing power, though they hold few rounds. The surrounding area can also be damaged by the explosions caused by their rounds. |
SUPPORT WEAPONS
 THROWING WEAPONS THROWING WEAPONS |
Weapons used by being thrown. Hold the Attack Button to increase the distance these weapons can be thrown. |
|---|---|
 PLACEABLE WEAPONS PLACEABLE WEAPONS |
Weapons placed at your feet or against surfaces. There are also weapons that activate automatically and can be remote-controlled. |